To enable Bill of Lading (BOL) capabilities, click here to go to the downloads for:
- Bill of Lading and Master Bill of Lading Custom Programs
- Sample Bill of Lading Schema
- Templates
How to get started with BOL printing through SYSPRO Reporting Services (SRS)
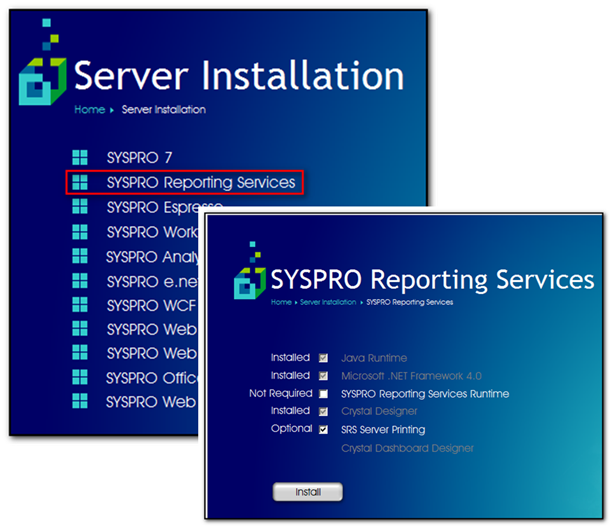
1. Verify SRS is installed on the application server-- see example below (contact SYSPRO or Dealer for downloads and/or licensing).
Note: if designing reports is planned, Crystal Designer must be installed; otherwise, the SRS Runtime is the only requirement. Designer includes the Runtime, so no need to install both.
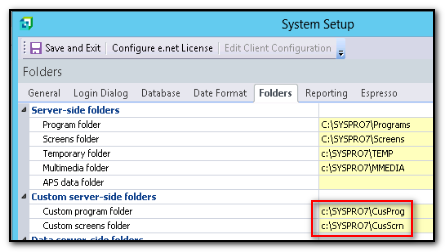
2. For SYSPRO 7 and below - Add or verify paths for custom server-side folders through SYSPRO--> General Setup--> System Setup (example below):
3. On the Cadacus SFS website, download the BOL Support zipped files.
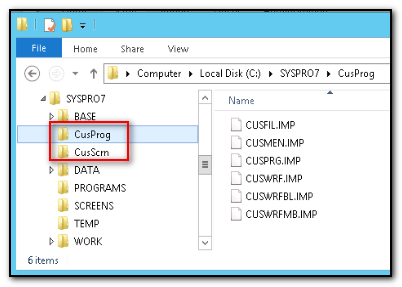
For SYSPRO 7 and below - Unzip the download and place the .IMP files in the CusProg folder (example below):
For SYSPRO 8 - Unzip the download and place the .IMP files in the Plugin\CustomStore folder.
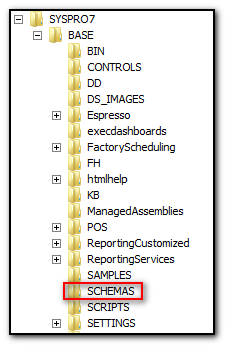
4. On the Cadacus SFS website, download the BOL SRS Support zipped files. Unzip the download and place the .XML and .XSD files in the SYSPRO BASE\SCHEMAS folder (example below):
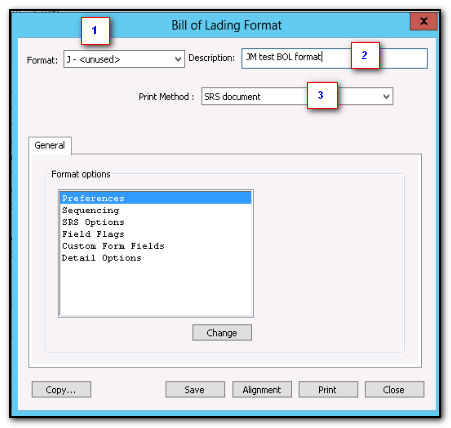
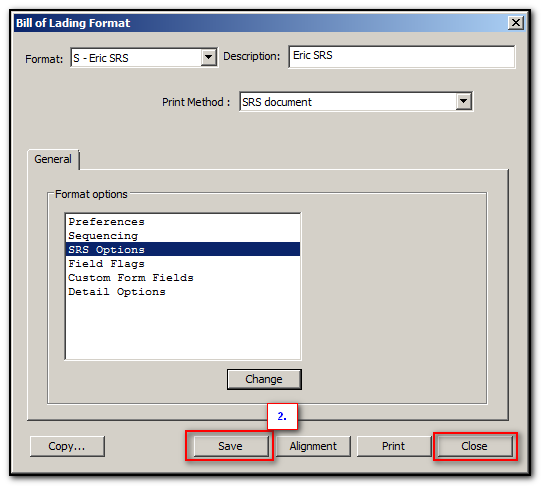
5. Go to EDIMNU under Warehouse Solutions and select "Bill of Lading Format". Select 1) an "unused" format, 2) enter a description, and 3) select "SRS document" as the Print Method. Click "Save" and "Close".
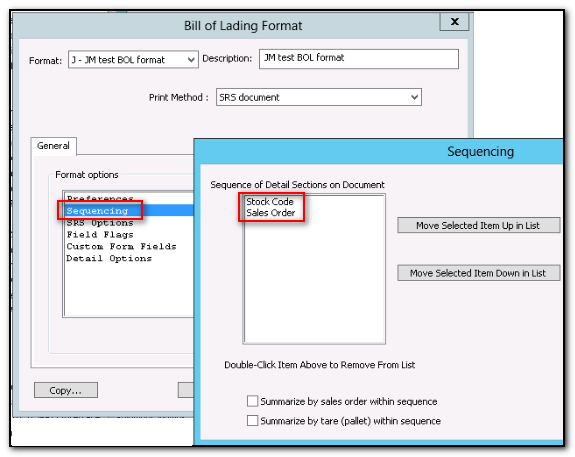
6. Re-open the Bill of Lading Format from the EDIMNU and choose the new SRS format just added from above. Set each of the "Format options" as needed. See the following examples:

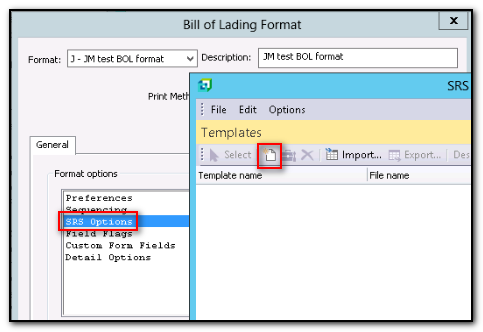
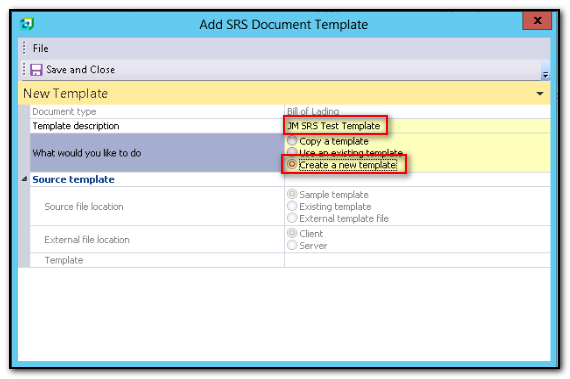
7. Under "SRS Options" for the BOL Format, select a new template or import an existing template, then choose "Design" to launch to Crystal Report Designer, as seen in the examples below:
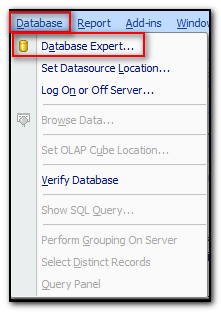
8. SRS BOL templates must be bound to a data source in Crystal Designer under Database--> Database Expert:
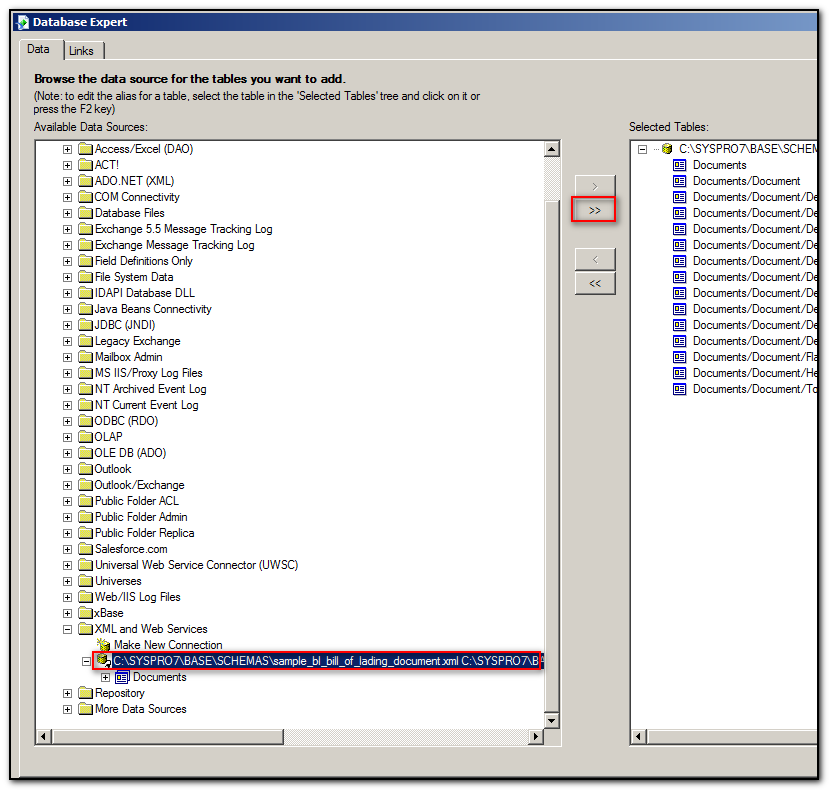
9. If a a data source already exists in the right-side pane "Selected Tables" for this SRS template, remove it. Under "Create New Connection", scroll down and find 1) "XML and Web Services", 2) browse to the SCHEMAS folder, and 3) select the "sample_bl_bill_of_lading_document.xml" previously downloaded. Be sure to also select the option choose the matching .XSD file. See example below.

10. Select the new connection in the left pane and click the double arrow to move it to the right pane. This step makes the BOL data fields defined in the XML and XSD files available to the SRS template.
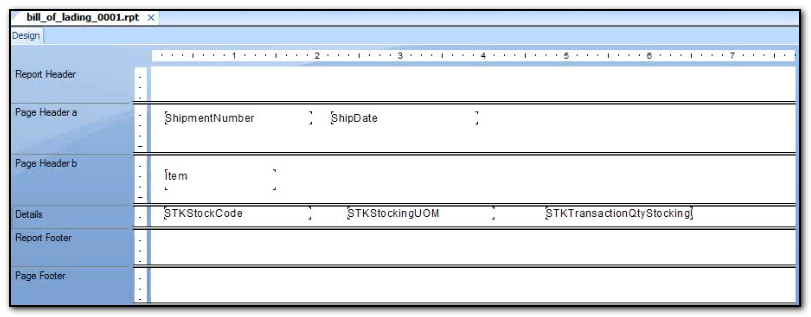
11. Now in Crystal Designer, the BOL details may be dragged and dropped into the template as needed and shown in this simplified example:
12. After changing the template, click the "Save" icon.
Important note: wait until the template 'Report Saved" alert appears before closing Crystal Designer, as it might take a moment before it appears.

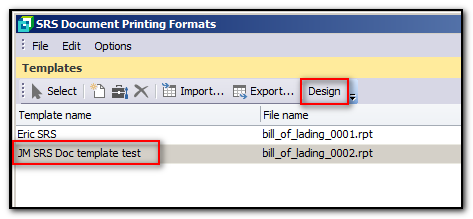
13. After closing Crystal Designer it is important to 1) highlight the template desired and click "Select", and 2) after returning to the "SRS Document Printing Formats" window,click "Save" and "Close". Otherwise, an SRS Print Error, "No document has been selected for the format" will occur.

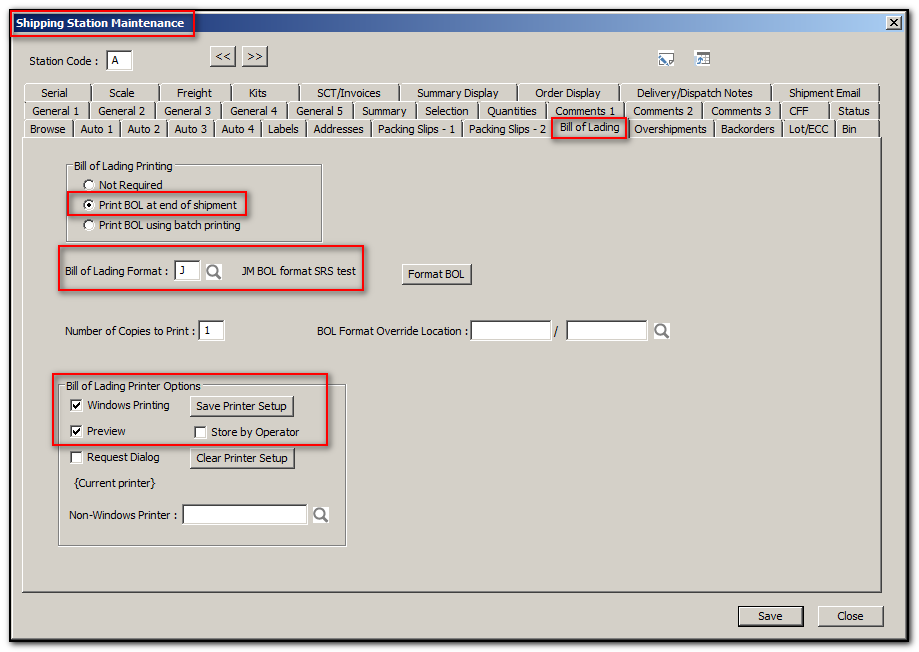
14. The default format for each Shipping Station may be set in the Bill of Lading tab under Shipping Station Maintenance, for example:
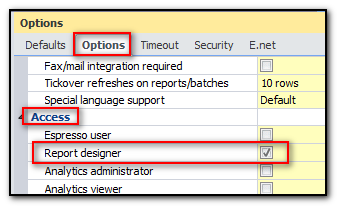
15. Be sure "Report Designer" is enabled for each user in SYSPRO who needs access to design or modify SRS templates.