Install Cadacus Solutions
Getting Started with Cadacus
for SYSPRO System Administrators
Below are links to sections on this page
![]()
| 1. | Download the Cadacus release matching the local SYSPRO version |
| 2. | For SQL-based companies, follow these steps |
| 3. | Place the XML license files in a convenient location |
| 4. | Register SYSPRO EDI/Shipping/Freight Addon licenses (if applicable) |
| 5. | Register Cadacus Solutions for SYSPRO licenses (if applicable) |
| 6. | Update Cadacus "Support Systems" (if applicable) |
| 7. | If using EDI, download and import the EDI Translation file |
| 8. | See Cadacus Solutions for SYSPRO installed |
- Launch a web browser and go here: http://solutionsforsyspro.com
- Click on the "Downloads" menu
- Select the Cadacus release matching the SYSPRO version being run
NOTE: for this tutorial, the latest release of SYSPRO 7 is used for example
Downloads--> Latest Release for SYSPRO--> SYSPRO 7.0
- Important note 1: be sure to run database and SYSPRO directory backups before applying updates
- Important note 2: be sure to test all updates in a test environment prior to applying updates in a live environment
- Copy and paste the downloaded .exe file to the SYSPRO folder: \BASE\UPGRADE\
- Launch SYSPRO from your Windows Start menu and login as a SYSPRO administrator..
- At launch, SYSPRO will prompt you to "upgrade your system now"-- choose "yes".
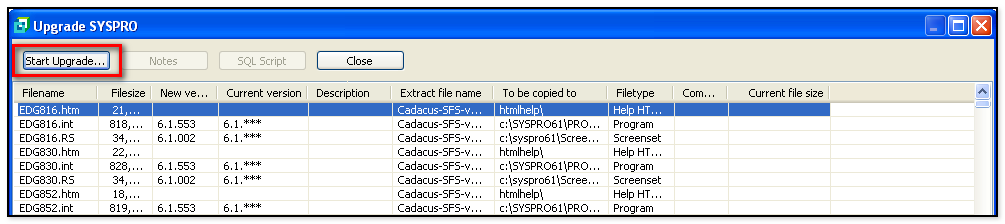
- The downloaded Cadacus upgrade will unzip (this may take a minute) and look like the following-- select "Start Upgrade".
- .When the upgrade completes, choose "OK" to logout and close SYSPRO.
2. For SQL-based companies, run the appropriate SQL script(s)
There are SQL scripts (EDITables.sql and EDIUpdate.sql) copied to the ..BASE\SCRIPTS directory during the update.The appropriate script must be run according to the steps below.
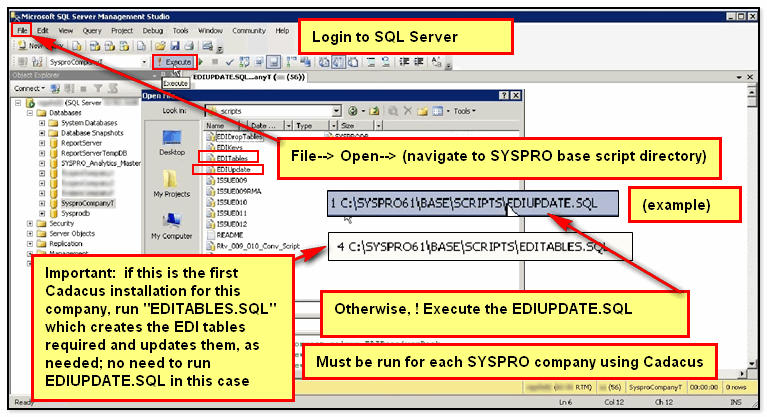
Note: if this is an upgrade from SYSPRO 6 to 7, please refer to other SQL considerations under Tutorials--> Installation/Upgrades--> SQL Scripts and SYSPRO 7 Installation /Update, or click here.
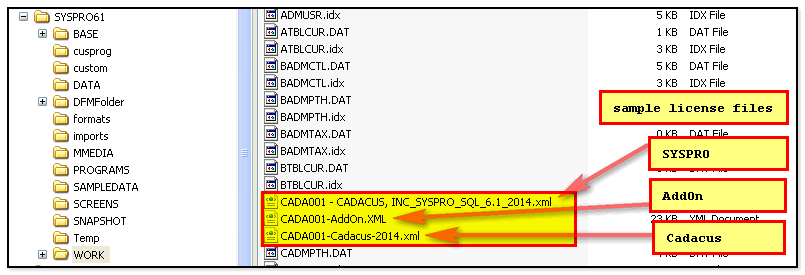
3. Place your XML license files in your chosen SYSPRO folder
- This is not a requirement, but SYSPRO will look for your license files in the SYPRO folder: \Work
- NOTE 1: These instructions assume the primary SYSPRO license file has already been installed.
- NOTE 2: Depending on the solutions your are licensing, you may have one or two Cadacus license files. For EDI, Shipping, and Freight Calculator Solutions, you will receive an "Addon" license from SYSPRO. For all other "Cadacus" solutions, you will receive a license file from Cadacus with the word "Cadacus" included in the file name. Below is an example of the license files:
This step will register licenses for the following SYSPRO Addons:
- EDI System
- Shipping System
- Freight Calculation System
- Launch SYSPRO from your Windows Start menu, click the SYSPRO "File" menu, and select "Run a Program":
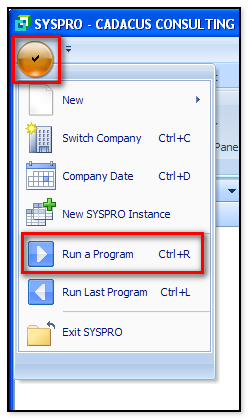
- Enter EDIMNU, then OK:

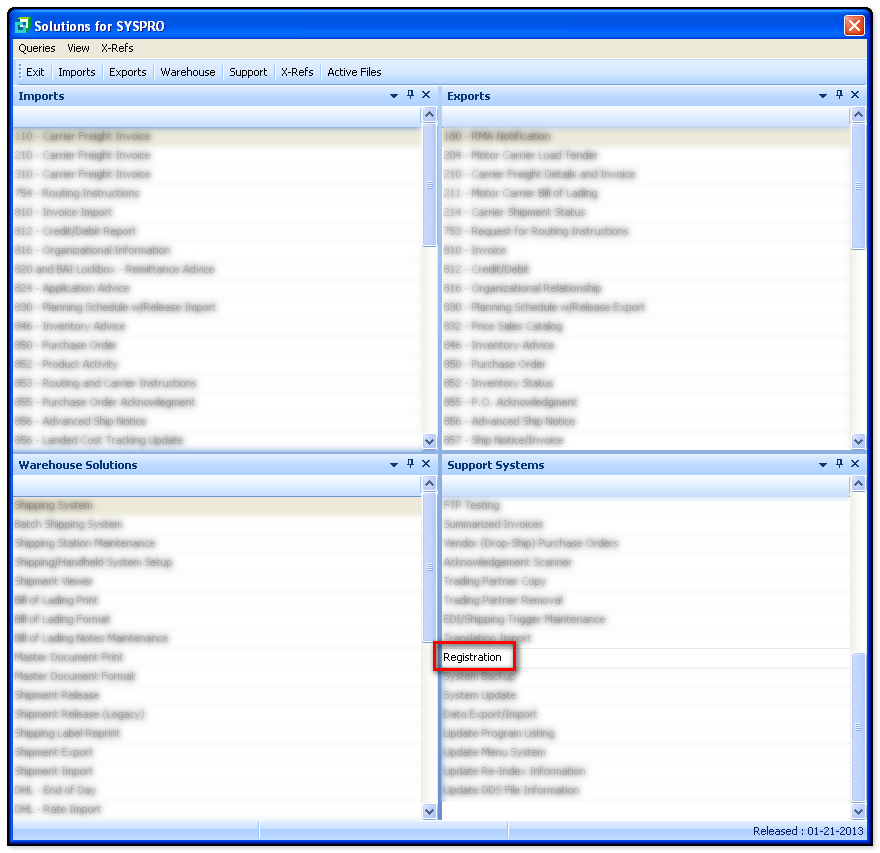
- The Solutions for SYSPRO window appears (below)-- double-click on "Registration":
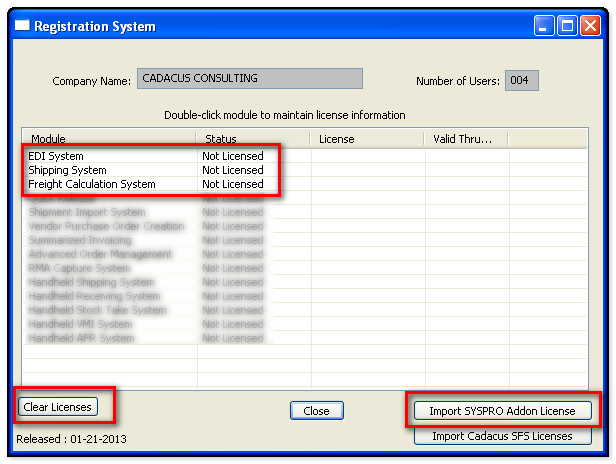
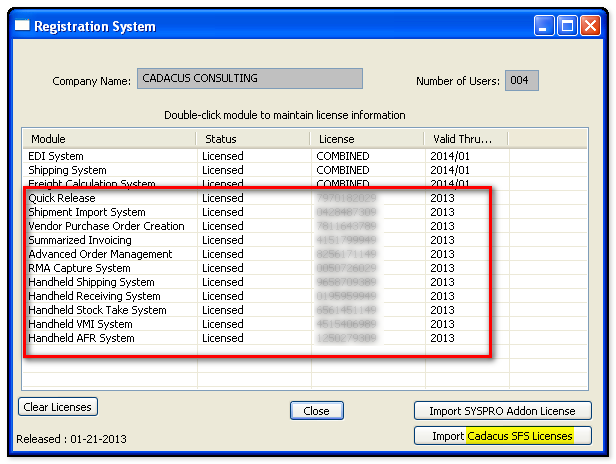
- The Registration System window appears (below):
1. Click "Clear Licenses", then
2. Click "Import SYSPRO Addon License"
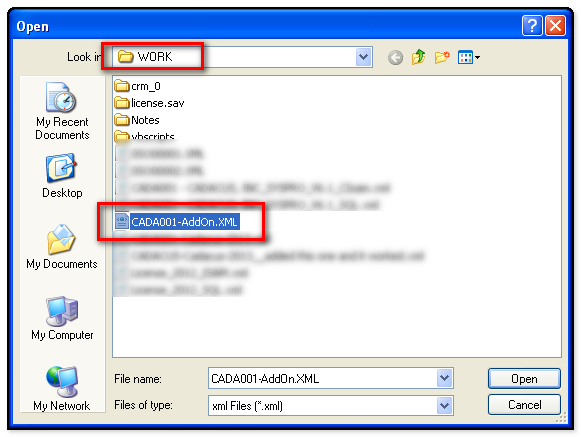
- Select the AddOn license that you copied to the SYSPRO \WORK folder and import it now:
- The solutions you have licensed will now show a "COMBINED" licensed status in the "Registration System" window (example showing all three licensed below):

- NOTE: For detailed instructions on licensing the Cadacus SFS Handheld Solution, go here.
- Now, if you also have licenses for Cadacus Solutions, click "Import Cadacus SFS Licenses" on the above window.
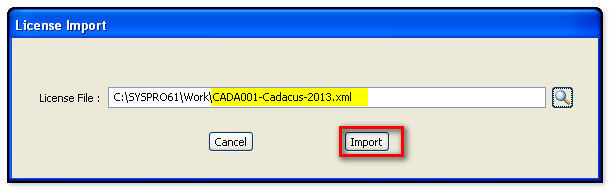
- Select the Cadacus Solutions for SYSPRO license file (copied from Step 2 above) and click "Import" (example below):
- The solutions you have licensed will now show a licensed status in the "Registration System" window (example showing all solutions licensed below):
6. Update Cadacus "Support Systems" (if applicable)
NOTE: this step is required only if you have Cadacus Solutions for SYSRO licenses in addition to SYSPRO licenses.
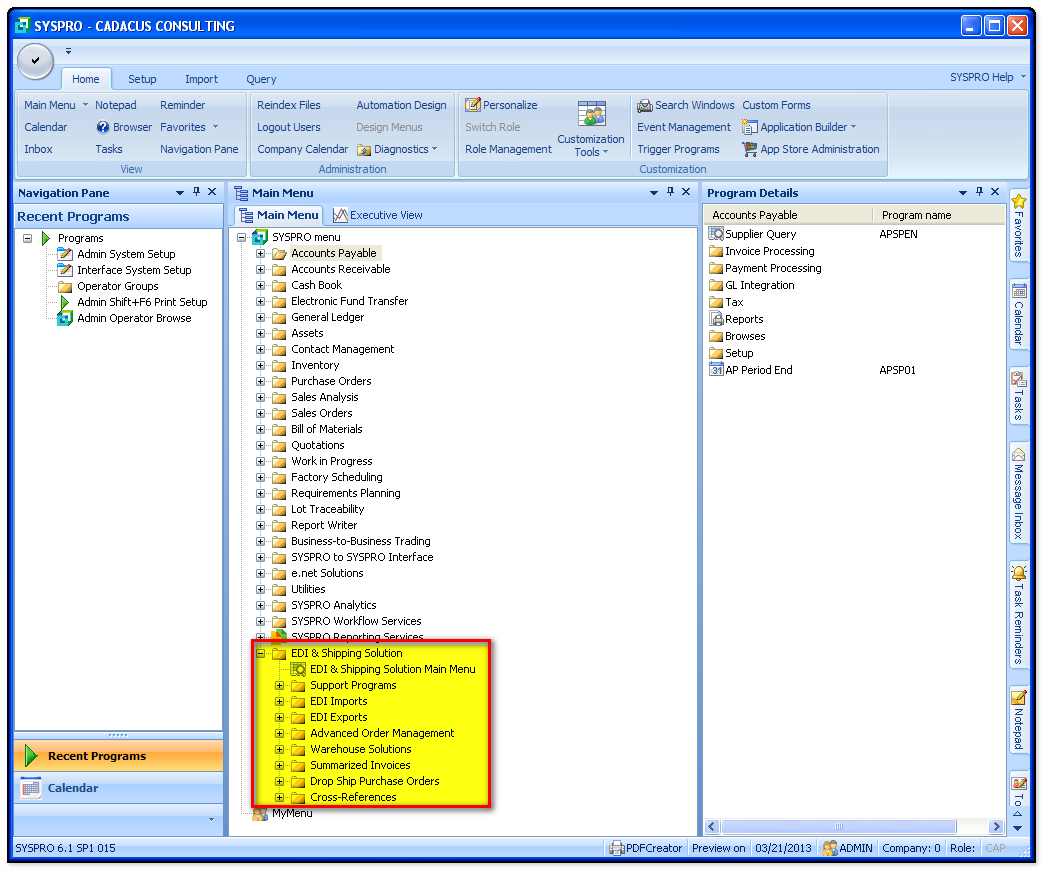
The next four steps are initiated from the bottom-right "Solutions for SYSPRO" menu. If you do not see this menu, go to the top-left SYSPRO "File" menu and choose "Run a Program", then enter "EDIMNU":
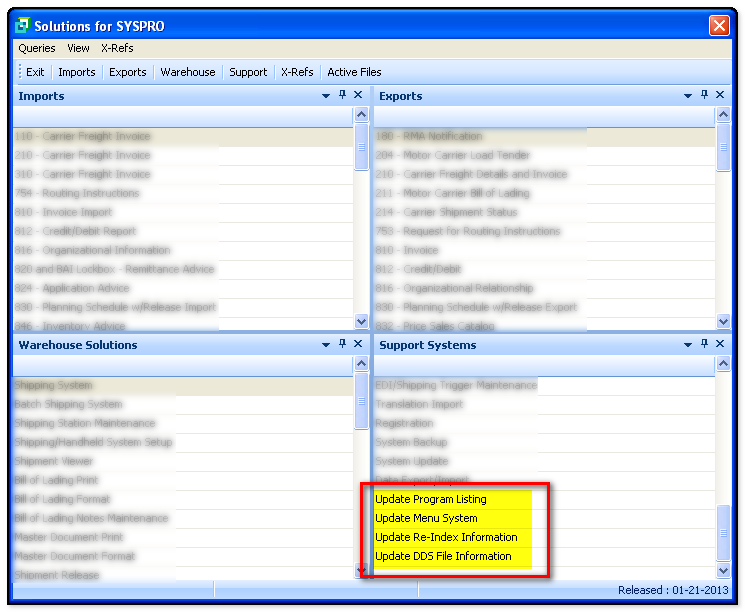
- At the above window, double-click "Update Program Listing", then at the below prompt, check "Enable Group Security, then click "Update Program Information":
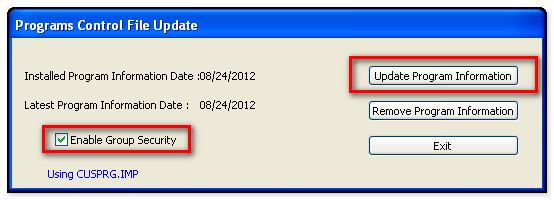
- "Program Information" is updated. If you get an error message, "Directory does not exist", create a new folder within the SYSPRO61 folder called "cusprog" and "Update Program Information" again..
- Now double-click "Update Menu System" from the "Solutions for SYSPRO" "Support Systems" pane.
- At this prompt (below), click "Update Menu Information":
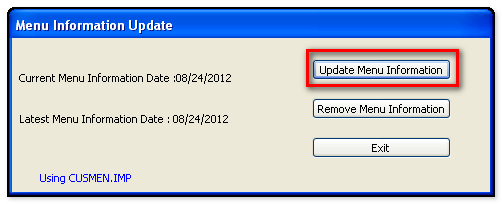
- You will see an informational prompt to "Restart Client to enable/disable Menu Entries"-- click "OK" and proceed here for now.
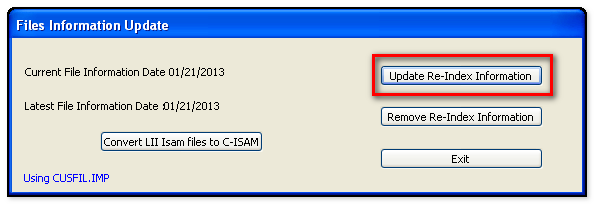
- Back to the "Support Systems" pane, double-click "Update Re-Index Information" and click the same at the prompt:
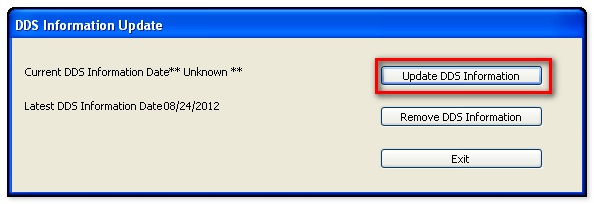
- Finally, back on the "Support Systems" pane, double-click "Update DDS File Information" and click the same at the prompt:
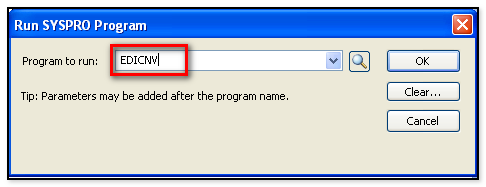
- Now, to check whether an update is required to the EDI database, go back to top-left SYSPRO main window and select the SYSPRO "File" menu and choose "Run a Program".
- Enter EDICNV and click "OK":
7. If using EDI, download and import the EDI Translation file.
- Download the EDI translation file here. This file contains translation information for supported documents for various ANSI versions. Save the downloaded zipped file and extract it to some easily accessible folder on the SYSPRO application server.
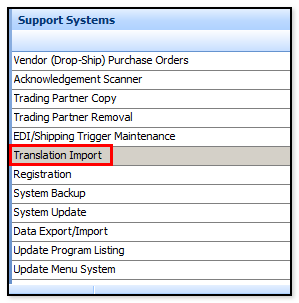
- Launch the EDI Translation Import menu:
- Browse to or enter the full path to the downloaded EDI translation text file using the drive letter as the SERVER sees it (not a mapped drive), as in the following example:
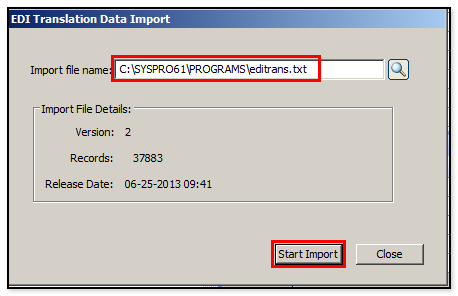
Click "Start Import" to run the import of all the document translation data. From this import, a file named EDITRN.DAT will be created in the DATA directory. The file is not company specific and is available to all companies using the DATA directory .
Note: If this step is not done, a "File not found" (EDITRN.DAT) error will occur when attempting to run or configure some EDI transactions.
8. Cadacus Solutions for SYSPRO installed.
NOTE: you must exit SYSPRO and relaunch it from your Windows Start menu to see the new menu items:
back to top
>